Call Today 910-443-0596
910-686-5296
Call Today 910-443-0596
910-686-5296

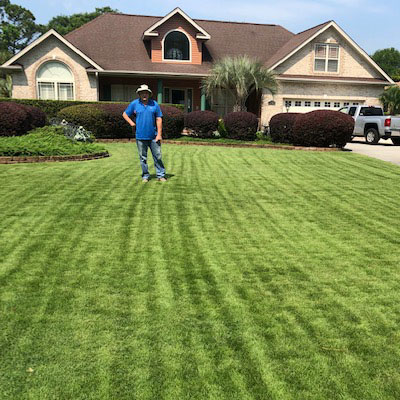
How to install sod
STEPS FOR SOIL PREPARATION AND SOD INSTALLATION and RESODDING
1. Spray out the old lawn and weeds with Roundup. Add a thimble full of Dawn dish soap to the Roundup mixture. Allow 3 days for a complete “kill”. Re-spray if necessary.
2. Remove all surface, dead vegetation by either roto-tilliing lightly (1” depth) or weed-eating all the debris down and rake off.
3. Eliminate all rocks and debris, and grade your surface soil to establish good surface drainage away from your home. Leave no high or low spots. If your soil soils is too sandy or too clayey – now is the time proper time to address this.
4. The soil level should be approximately 1” below the level of your driveway, patio and sidewalks.
5. If your soil is too soft by seeing foot impressions of 1” than lightly moisten it to compact the soil prior to installing the sod. You may have to roll the soil with a water-filled roller.
6. If the temperature is hot outside, the soil will be hot too. Before installing any sod during high temperatures, moisten the soil lightly to cool it down. The roots of the sod will burn, unnecessarily, if you don’t do this, causing the sod to turn brown.
7. Border all gardens, walkways and driveways with sod, and than start installing the sod row by row, and offsetting the seams. As the installation continues, it is good idea to lightly water all newly sodded areas section by section – especially – if it is hot outside.
8. All small pieces of sod can be used to fill in small areas.
9. After the sod installation has been completed, roll the newly sodded lawn diagonal to the seams in 2 different directions. A water filled roller is available at all rental shops.
10. For sod installations during the growing season (April through mid -November) fertilize lightly with a STARTER fertilizer 5:5:15 or a 5:10:15 that is low in Nitrogen (8% or less) and water in immediately. You can also choose to apply this fertilizer to the soil – prior to sod installation – and rake this fertilizer in and water.
11. Watering properly is an important part of establishing a successful and new sodded lawn that you are very satisfied with.
After the sod installation is complete, water the entire new sodded lawn for 30 minutes per zone. Than water daily in the morning (start irrigation zones at 5:00 AM) for up to 45 minutes per zone. If it is hot outside a mid afternoon watering of 10 minutes may be necessary to cool the sod and keep the sod pad or roll continuously moist.
After the sod has knitted down (requiring one to two weeks during the growing season) reduce the frequency of watering to every other day, and to every third day by the third week. After this wait to to water until until you see water stress with the sod grass which is indicated in your lawn by seeing bluish-silver-grey blotches. Water the next morning and turn off your irrigation system. This process of deep watering and making the roots search for water will develop the deepest root system possible. A deep and massive root system enhances and promotes a healthy lawn that is resistant to stresses like winter injury, drought,and it provides for a faster recuperation if damage does occur.
12. Mow as soon as the sod needs mowing. Frequent mowing stimulates root production and growth – a very beneficial process for establishing a healthy, competitive lawn.

INSTALLING SOD IS EASY IF YOU HAVE QUALITY TO DEAL WITH FROM
SUPERIOR SOD.

We Invite you to download our Turf Management Guide

Download Our Free Turf Guide